 by
by Understand Your Camera Lenses
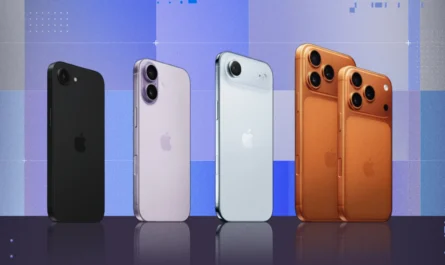
Modern iPhones, designed by Apple Inc., are equipped with advanced multi-lens camera systems that allow users to capture professional-quality photos without needing a dedicated camera. However, many users only rely on the default camera setting and never fully explore what each lens can do. Understanding your iPhone camera lenses is one of the most important steps toward improving your photography skills.
This in-depth guide will explain how each lens works, when to use it, and how to get the best results in different situations.
1. What Are iPhone Camera Lenses?
iPhones use multiple built-in lenses to simulate different focal lengths—something traditionally done with interchangeable lenses on DSLR or mirrorless cameras. Each lens offers a different perspective, field of view, and photographic effect.
Instead of relying on digital zoom (which reduces image quality), iPhones switch between physical lenses to maintain sharpness and clarity. These lenses are typically labeled in the camera app as 0.5x, 1x, 2x, 3x, or higher, depending on your iPhone model.
Understanding these numbers is key:
-
Lower numbers = wider view
-
Higher numbers = closer, zoomed-in view
2. The Ultra-Wide Lens (0.5x)
The ultra-wide lens is designed to capture a much larger area than the human eye can normally see. It has a very wide field of view, which makes it perfect for scenes where you want to include as much as possible.
Key characteristics:
-
Extremely wide perspective
-
Slight edge distortion
-
Lower low-light performance compared to the main lens
Best use cases:
-
Landscape photography (mountains, beaches, cityscapes)
-
Group photos where you need to fit many people
-
Architecture and interiors
-
Creative shots with dramatic perspectives
For example, when you’re standing in front of a tall building or a scenic viewpoint, the ultra-wide lens allows you to capture the entire scene without stepping back.
Things to watch out for:
Because of its wide angle, objects near the edges of the frame may appear stretched or distorted. This can make people look unnatural if they’re not positioned carefully. To avoid this, keep your subject closer to the center of the frame.
3. The Wide Lens (1x) — The Main Camera
The wide lens is the default camera on your iPhone and is often the most powerful. It offers the best balance of sharpness, color accuracy, and low-light performance.
Key characteristics:
-
Natural perspective similar to human vision
-
High image quality
-
Excellent performance in most lighting conditions
Best use cases:
-
Everyday photography
-
Portraits
-
Food and product photography
-
Low-light situations
If you’re unsure which lens to use, the wide lens is almost always the safest choice. It produces consistent, high-quality results and works well in nearly all scenarios.
Why it’s important:
This lens typically has the largest sensor and best image processing capabilities, which means it captures more detail and handles lighting better than the other lenses.
4. The Telephoto Lens (Zoom Lens)
The telephoto lens allows you to zoom in on subjects without losing image quality. Unlike digital zoom, which crops the image, telephoto lenses use optical zoom to maintain clarity.
Depending on your iPhone model, you may have:
-
2x zoom
-
3x zoom
-
5x zoom (on newer Pro models)
Key characteristics:
-
Narrow field of view
-
Compression effect (background appears closer)
-
Ideal for isolating subjects
Best use cases:
-
Portrait photography
-
Capturing distant subjects (wildlife, sports, events)
-
Street photography
-
Creating a professional “blurred background” look
The telephoto lens is especially useful when you can’t physically move closer to your subject. It also creates a more flattering look for portraits by compressing facial features slightly.
Limitations:
Telephoto lenses usually perform worse in low light compared to the main lens. In dim conditions, your iPhone may automatically switch back to the wide lens and apply digital zoom instead.
5. Optical Zoom vs Digital Zoom
One of the most important concepts to understand is the difference between optical zoom and digital zoom.
-
Optical Zoom: Uses the actual lens to magnify the image without losing quality.
-
Digital Zoom: Crops and enlarges the image, reducing sharpness and detail.
Whenever possible, stick to the built-in lens options (0.5x, 1x, 2x, etc.) instead of pinching to zoom beyond those levels.
6. Choosing the Right Lens for the Situation
Knowing when to switch lenses is what separates casual photos from professional-looking shots.
Use ultra-wide when:
-
You want to capture a large scene
-
You’re shooting landscapes or interiors
-
You want a dramatic, creative perspective
Use wide when:
-
You need the best overall quality
-
You’re shooting in low light
-
You want a natural-looking image
Use telephoto when:
-
You want to zoom without losing quality
-
You’re shooting portraits
-
You want to isolate your subject
7. How Lenses Affect Composition
Each lens changes how your photo looks—not just what it captures.
-
Ultra-wide exaggerates distance and depth
-
Wide keeps proportions natural
-
Telephoto compresses distance and brings background closer
Understanding this helps you control the feel and storytelling of your image.
8. Lens and Lighting Considerations
Different lenses perform differently depending on lighting conditions.
-
The wide lens performs best in low light
-
Ultra-wide and telephoto need more light for optimal results
If your photo looks noisy or blurry, switching back to the main (1x) lens can improve quality instantly.
9. Portrait Mode and Lens Choice
Portrait Mode works best with telephoto lenses because they naturally create background blur and depth. However, newer iPhones also support Portrait Mode on the wide lens.
For best results:
-
Use telephoto for sharper, more professional portraits
-
Ensure good lighting
-
Maintain proper distance from the subject
10. Common Mistakes to Avoid
Many users don’t get the most out of their iPhone camera because of simple mistakes:
-
Overusing digital zoom
-
Using ultra-wide for portraits (causes distortion)
-
Ignoring lighting conditions
-
Not switching lenses when needed
Being aware of these mistakes can instantly improve your photography.
11. Creative Techniques Using Different Lenses
Once you understand the basics, you can experiment creatively:
-
Use ultra-wide for dramatic foreground emphasis
-
Use telephoto for cinematic compression
-
Switch lenses mid-shoot to tell different visual stories
For example, a travel photo can include:
-
A wide shot for context
-
A telephoto shot for detail
-
An ultra-wide shot for impact
12. Practice Makes Perfect
Understanding lenses is just the beginning. The best way to improve is through practice.
Try this:
-
Take the same photo using all three lenses
-
Compare how each one looks
-
Notice differences in perspective, lighting, and composition
This hands-on approach will quickly improve your skills.
Final Thoughts
Your iPhone camera is far more powerful than it appears—but only if you know how to use it. Each lens serves a specific purpose, and learning when to switch between them can transform your photography.
The ultra-wide lens captures more of the world, the wide lens delivers the best overall quality, and the telephoto lens brings distant subjects closer while adding a professional touch. By understanding these tools and practicing regularly, you can take photos that stand out—without needing any additional equipment.
Master your lenses, and you’ll master your iPhone photography. 📸